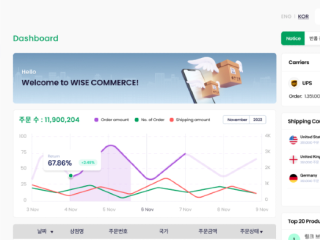
If you’re selling cross-border through Shopify, operating both a domestic warehouse and an overseas local warehouse can be an efficient strategy. However, many merchants face challenges in managing inventory and automating order fulfillment across two warehouses. This guide provides strategies for managing inventory effectively and explains how to use the Shopify Flow app to automatically tag orders.
1. Inventory Management Strategy for Two Warehouses
To manage inventory for both domestic and overseas local warehouses while keeping it unified within Shopify, follow these steps:

1.1 Setting Up Warehouses
- Navigate to Settings > Locations in your Shopify admin page.
- Click Add Location to add two warehouses (e.g., “Domestic Warehouse” and “Overseas Warehouse”).
- Enter the name and address of each warehouse, then save.
1.2 Allocating Inventory by Product
- Go to the Products tab in your Shopify admin page.
- Open the details page for each product.
- In the “Inventory Management” section, allocate inventory quantities for each warehouse.
For instance, you might allocate 100 units to the domestic warehouse and 50 units to the overseas warehouse.
2. Automating Order Tagging with Shopify Flow
Shopify Flow is a powerful app for setting up automation workflows. By tagging orders automatically based on shipping destination, you can easily sort orders for domestic and overseas warehouses.

2.1 Installing Shopify Flow
- Search for Shopify Flow in the Shopify App Store.
- Install the app and add it to your Shopify admin page.
2.2 Creating an Order Tagging Workflow
- Open the Flow app in your Shopify admin page.
- Click Create Workflow.
Step 1: Set the Trigger
- Choose the trigger Order Created.
Step 2: Add Conditions
- Add a condition block to check the shipping country:
- Condition: If shipping destination (country) is the United States.
Step 3: Add Actions
- Depending on the condition, add the following actions:
- Add Order Tag: Add a specific tag for qualifying orders, such as “US Warehouse” or “Other Countries”.
Example Workflow
Trigger: Order Created
└─ Condition: Is the shipping destination the United States?
└─ Action: Add the tag “US Warehouse”
└─ Condition: Is the shipping destination outside the United States?
└─ Action: Add the tag “Other Countries”.
Step 4: Save and Activate
- Save the workflow and activate it.
- Tags will now be added automatically to new orders based on the set conditions.
3. Managing Fulfillment from Two Warehouses
3.1 Filtering Orders by Tag
- In your Shopify admin, go to the Orders page.
- Click Add Filter and select Tag.
- Filter orders by tags like “US Warehouse” or “Other Countries” to process them separately.
3.2 Optimizing Logistics with WISE COMMERCE

To integrate domestic and overseas logistics management seamlessly, consider using WISE COMMERCE’s cross-border solutions.
- Global Shipping Partners: WISE COMMERCE integrates with leading shipping providers like FedEx, UPS, and DHL to optimize international deliveries.
- Automated Data Sync: Synchronize order and inventory data to streamline logistics between warehouses.
- Smooth Shopify Integration: Use WISE COMMERCE’s tools to enhance order tagging and logistics management, ensuring a hassle-free workflow.
Conclusion
When operating two warehouses with Shopify, efficient inventory management and automated order tagging are essential to improving operational efficiency. By following this guide, you can manage inventory effectively and use Shopify Flow to automate order processing. Additionally, WISE COMMERCE’s cross-border solutions can further optimize logistics, reducing complexity and allowing you to focus on scaling your business.


Leave a Reply